
The Best Nikon DSLR Settings for Sharp and Professional Portraits
Portrait photography has always been one of the most rewarding genres of photography. A great portrait can capture emotion, personality, and character in a way that few other types of images can. Yet many photographers struggle to achieve consistently sharp and professional-looking portraits, even when using high-quality Nikon DSLR cameras and expensive lenses.
The truth is that creating beautiful portraits isn’t simply about owning the latest camera body or the fastest lens. Professional results come from understanding how your camera settings work together and knowing when to adjust them based on the shooting environment.
Whether you’re using a Nikon D3500, D5600, D7500, D750, D780, D850, or another Nikon DSLR model, the principles remain the same. The right combination of aperture, shutter speed, ISO, autofocus settings, and white balance can dramatically improve your portrait photography and help you produce images that look polished and professional.
In this guide, we’ll explore the best Nikon DSLR settings for portrait photography, explain why each setting matters, and show you how to adapt your camera setup for different shooting situations.
Why Camera Settings Matter More Than Camera Price
Many beginners assume that buying an expensive camera will automatically improve their photography. While better equipment can certainly help, camera settings play a much bigger role than most people realize.
A photographer using a Nikon D5600 with proper settings can often create more appealing portraits than someone using a Nikon D850 in full Auto mode.
Portrait photography depends heavily on several technical factors:
- Sharp focus on the subject’s eyes
- Accurate exposure
- Natural skin tones
- Smooth background blur
- Proper depth of field
- Clean image quality with minimal noise
Each of these factors is controlled directly by your camera settings.
Learning how to adjust these settings correctly will have a far greater impact on your images than upgrading your equipment.
Understanding the Exposure Triangle
Before diving into specific Nikon DSLR settings, it’s important to understand the exposure triangle.
The exposure triangle consists of three main settings:
- Aperture
- Shutter Speed
- ISO
These settings work together to determine how bright or dark your image appears.
More importantly, they also influence depth of field, motion blur, and image quality.
Professional portrait photographers don’t simply adjust one setting independently. They understand how all three settings interact and balance them accordingly.
Mastering the exposure triangle is one of the fastest ways to improve your portrait photography.
Choosing the Right Shooting Mode
Nikon DSLRs offer several shooting modes, but not all of them are equally useful for portrait photography.
Aperture Priority Mode (A)
For most photographers, Aperture Priority mode is the ideal starting point.
In this mode, you choose the aperture while the camera automatically selects an appropriate shutter speed.
Benefits include:
- Faster workflow
- Better control over background blur
- Consistent exposure
- Easier learning curve
Many professional photographers use Aperture Priority mode during outdoor portrait sessions because lighting conditions can change rapidly.
Manual Mode (M)
Manual mode provides complete control over camera settings.
This mode is especially useful when:
- Working in a studio
- Using flash
- Photographing in consistent lighting
- Creating a specific artistic look
Manual mode requires more practice but offers the greatest creative control.
The Best Aperture Settings for Portrait Photography
Aperture is often the most important setting in portrait photography because it controls depth of field.
Depth of field determines how much of the image appears sharp.
A wide aperture creates a blurred background, helping the subject stand out from the surroundings.
Recommended Aperture Settings
Headshots
For close-up portraits:
- f/1.8
- f/2
- f/2.2
These settings create strong background separation and emphasize facial features.
Half-Body Portraits
For waist-up compositions:
- f/2.2
- f/2.8
- f/3.2
These values provide sufficient sharpness while maintaining attractive background blur.
Couple Portraits
When photographing two people:
- f/3.5
- f/4
- f/4.5
A slightly narrower aperture helps ensure both subjects remain in focus.
Group Portraits
For family portraits and groups:
- f/5.6
- f/8
This provides enough depth of field to keep everyone sharp.
One common mistake among beginners is shooting everything at f/1.8. While wide apertures can produce beautiful results, they also make focusing more challenging. Sometimes stopping down slightly creates sharper and more reliable images.
The Ideal Shutter Speed for Sharp Portraits
Many photographers underestimate the importance of shutter speed.
Even when subjects appear motionless, subtle movements can introduce blur.
Eye movement, breathing, and slight shifts in posture can all affect image sharpness.
Recommended Shutter Speeds
For standard portraits:
- 1/160 second
For handheld close-ups:
- 1/200 second
For active children:
- 1/320 second
For outdoor portraits with movement:
- 1/500 second
A good rule is to avoid letting your shutter speed drop below 1/125 second unless you’re using a tripod.
Professional photographers often prioritize shutter speed because sharpness is difficult to fix during editing.
Finding the Perfect ISO Setting
ISO controls your camera sensor’s sensitivity to light. While modern Nikon DSLRs perform remarkably well at higher ISO values, keeping ISO as low as possible generally produces cleaner and more detailed images.
One of the easiest ways to identify amateur photography is excessive image noise caused by unnecessarily high ISO settings.
Recommended ISO Values
Bright outdoor conditions
- ISO 100
Cloudy conditions
- ISO 200–400
Indoor natural light
- ISO 400–800
Low-light environments
- ISO 800–1600
Very dark situations
- ISO 1600–3200
When photographing portraits, image quality should always be a priority. If possible, increase available light rather than raising ISO excessively.
For example, moving your subject closer to a window often improves image quality more effectively than increasing ISO from 400 to 1600.
Mastering Nikon Autofocus Settings
Sharp eyes are one of the defining characteristics of professional portrait photography.
When viewers examine a portrait, their attention naturally goes to the eyes first. If the eyes are sharp, the image feels professional. If they aren’t, even an otherwise beautiful photograph can feel disappointing.
Fortunately, Nikon DSLRs provide several autofocus options that can help improve focus accuracy.
AF-S (Single Servo Autofocus)
AF-S is usually the best choice for traditional portrait photography.
In this mode:
- Focus locks once acquired
- The camera prioritizes accuracy
- Ideal for stationary subjects
This mode works exceptionally well for:
- Headshots
- Family portraits
- Engagement sessions
- Studio photography
AF-C (Continuous Servo Autofocus)
AF-C continuously tracks moving subjects.
Use this mode when photographing:
- Children
- Lifestyle portraits
- Events
- Active outdoor sessions
Many portrait photographers switch between AF-S and AF-C depending on the subject’s movement.
Single-Point AF vs Dynamic Area AF
Choosing the correct autofocus area mode can significantly improve portrait sharpness.
Single-Point AF
Single-Point AF allows you to manually select the exact focus point.
Advantages include:
- Maximum control
- More precise eye focus
- Consistent results
For most portrait situations, Single-Point AF is the preferred choice.
Dynamic Area AF
Dynamic Area AF uses surrounding focus points to assist tracking.
This mode works well when:
- Subjects move unpredictably
- Photographing children
- Capturing candid portraits
Many Nikon photographers rely on Dynamic Area AF during outdoor lifestyle sessions.
How to Focus on the Eyes Every Time
One habit separates experienced portrait photographers from beginners.
They always focus on the eyes.
The nearest eye should typically be the sharpest point in the image.
A simple workflow:
- Select Single-Point AF.
- Position the focus point over the nearest eye.
- Half-press the shutter.
- Confirm focus.
- Capture the image.
This technique becomes second nature with practice and dramatically improves portrait quality.
White Balance and Natural Skin Tones
Even perfectly exposed portraits can look unnatural if the white balance is incorrect.
Skin tones should appear realistic and flattering.
Recommended White Balance Settings
Sunny Conditions
- Daylight
Cloudy Conditions
- Cloudy
Shade
- Shade Preset
Indoor Window Light
- Auto White Balance
Studio Flash
- Flash Preset
Many professionals shoot RAW because it allows white balance adjustments later, but getting it close in-camera saves editing time.
Understanding Metering Modes
Metering determines how your Nikon DSLR measures light.
Choosing the correct metering mode can prevent underexposed faces and blown highlights.
Matrix Metering
Matrix metering evaluates the entire scene.
Good for:
- General portrait work
- Even lighting conditions
- Beginners
Center-Weighted Metering
This mode prioritizes the center portion of the frame.
Excellent for:
- Portrait photography
- Outdoor sessions
- Backlit situations
Many professional portrait photographers prefer Center-Weighted Metering because it places more importance on the subject.
Spot Metering
Spot metering measures a very small area.
Useful when:
- Shooting against bright skies
- Photographing backlit subjects
- Working in challenging lighting
When using Spot Metering, meter directly from the subject’s face for the most accurate exposure.
Picture Control Settings for Better Portraits
Nikon’s Picture Control settings influence how JPEG images are processed.
For portrait photography:
Portrait Picture Control
Benefits include:
- Softer skin rendering
- Pleasant color tones
- Natural contrast
Neutral Picture Control
Benefits include:
- Maximum editing flexibility
- Reduced contrast
- Better highlight retention
RAW shooters often choose Neutral because they intend to edit later.
Outdoor Portrait Settings
Outdoor photography presents unique challenges because lighting changes constantly.
Recommended Outdoor Setup
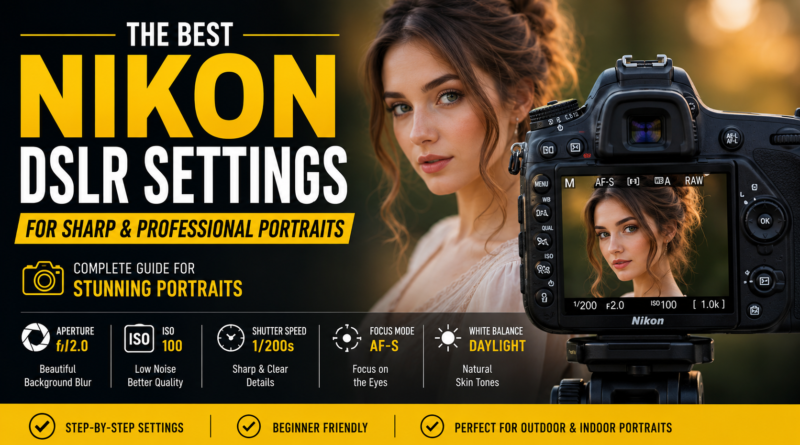
- Mode: Aperture Priority
- Aperture: f/2.0–f/2.8
- ISO: 100–200
- Shutter Speed: Minimum 1/200 sec
- Focus Mode: AF-S
- Metering: Center-Weighted
- White Balance: Daylight
Golden Hour Portrait Photography
Golden hour occurs shortly after sunrise and before sunset.
Benefits include:
- Softer light
- Better skin tones
- Reduced shadows
- More flattering portraits
Many professional portrait photographers schedule sessions specifically around golden hour because of the quality of light.
Indoor Portrait Settings
Indoor photography requires a different approach.
Light levels are usually lower, forcing photographers to balance shutter speed and ISO carefully.
Recommended Indoor Setup
- Mode: Manual
- Aperture: f/2.8
- ISO: 400–800
- Shutter Speed: 1/160 sec
- Focus Mode: AF-S
- White Balance: Auto
Positioning subjects near large windows often produces beautiful natural light without requiring expensive equipment.
Flash Settings for Portrait Photography
Many photographers avoid flash because they fear creating harsh images.
However, when used correctly, flash can significantly improve portrait quality.
Basic Flash Setup
- ISO 100
- Shutter Speed 1/200 sec
- Aperture f/4
- Bounce flash when possible
Bouncing flash from a ceiling or wall creates softer and more natural-looking light.
Avoid aiming direct flash at your subject whenever possible.
The Role of Post-Processing
Even professionally captured portraits benefit from thoughtful editing.
Post-processing can help:
- Improve skin tones
- Correct exposure
- Enhance sharpness
- Remove distractions
- Refine colors
For photographers managing large numbers of portraits, outsourcing editing can save considerable time. Many professionals use specialized services such as Photo Editing Services Company to handle retouching, background cleanup, and color correction while maintaining a consistent editing style across client galleries.
Common Portrait Photography Mistakes
Even experienced photographers occasionally make mistakes.
Here are some of the most common issues:
Focusing on the Wrong Area
Always prioritize the eyes.
Using Extremely Wide Apertures
While f/1.4 can look beautiful, it can also make focusing difficult.
Ignoring Background Distractions
A cluttered background can ruin an otherwise excellent portrait.
Shooting at Slow Shutter Speeds
Blur cannot always be fixed during editing.
Overediting Skin
Natural skin texture generally looks more professional than overly smoothed skin.
Nikon Portrait Settings Cheat Sheet
Outdoor Portraits
- Aperture: f/2.0
- ISO: 100
- Shutter Speed: 1/200 sec
- AF-S
- Center-Weighted Metering
Indoor Portraits
- Aperture: f/2.8
- ISO: 400–800
- Shutter Speed: 1/160 sec
- AF-S
- Auto White Balance
Group Portraits
- Aperture: f/5.6
- ISO: 100–400
- Shutter Speed: 1/200 sec
Final Thoughts
Creating sharp and professional portraits with a Nikon DSLR isn’t about memorizing a single set of camera settings. It’s about understanding how aperture, shutter speed, ISO, autofocus, white balance, and metering work together in different situations.
As you gain experience, you’ll learn to adjust settings instinctively based on lighting conditions and subject movement. Start with the recommendations in this guide, practice regularly, and pay close attention to your results. Over time, you’ll develop a workflow that consistently produces portraits with crisp focus, beautiful skin tones, and the polished look clients expect from professional photography.