
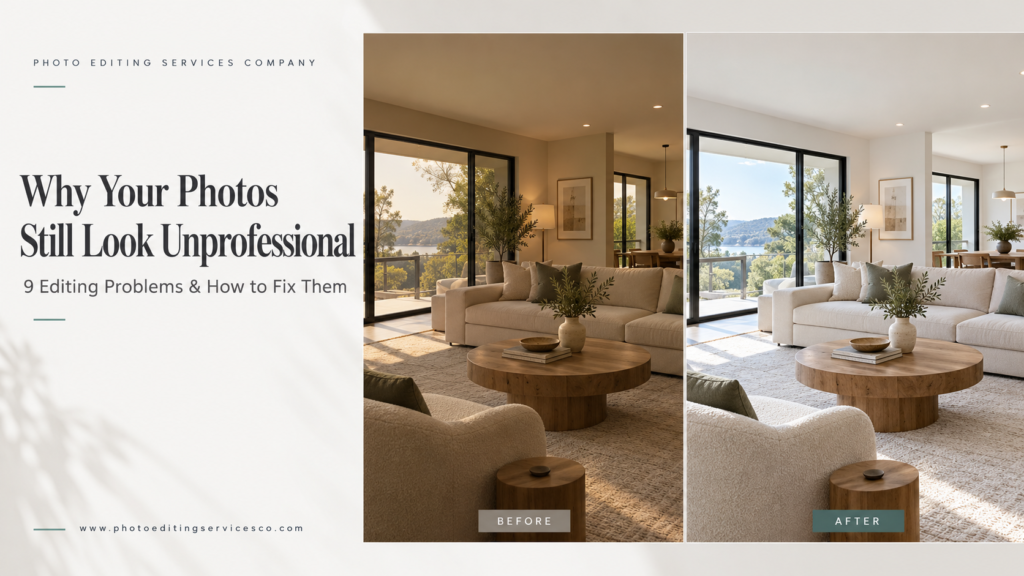
Why Your Photos Still Look Unprofessional: 9 Common Editing Problems and How to Fix Them
You have adjusted the brightness, applied a preset, and sharpened the image. Yet something still looks wrong.
A white product has turned slightly yellow. A portrait looks smooth but unnatural. A property photograph is bright, but the windows have lost all detail. A background looks clean until you notice a pale outline around the subject.
These problems are rarely solved by adding another filter.
Professional-looking photographs depend on several decisions working together: accurate color, controlled exposure, believable texture, clean edges, consistent composition, and suitable output settings.
Whether you sell products online, photograph weddings, market properties, or create advertising content, understanding these decisions helps you identify what an image actually needs.
This guide explains nine common photo editing problems, how to correct them, and when specialist support can help.
First, Identify What the Photograph Needs to Do
Before editing an image, decide its purpose.
A product photograph should communicate the item’s actual appearance. A portrait should present the person naturally. A property photograph should help viewers understand the space. An advertising composite may allow more creative interpretation.
The same editing treatment will not suit every assignment.
Ask three questions:
- What should the viewer notice first?
- Which details must remain accurate?
- Where will the finished image appear?
These answers help establish the limits of the edit. A dramatic color treatment may suit a creative campaign but misrepresent a product’s color. Strong background blur may improve a portrait while hiding information needed in a property photograph.
Good editing starts with the intended use, not a preferred preset.
1. The Image Looks Dull Even After Increasing Brightness
What Causes It?
A photograph can look dull because the subject lacks separation from its surroundings, the midtones are flat, or the lighting provides little shape.
Increasing brightness across the entire image may lighten the background without improving the subject. It can also push highlights toward pure white.
How to Fix It
Begin with overall exposure, then evaluate highlights, shadows, and midtone contrast separately.
Use local adjustments when one area needs attention. A dark product may need selective lightening while the background remains unchanged.
Preserve some shadow depth. Shadows help describe shape and prevent objects from looking flat.
Example: In a living room photograph, lifting the interior selectively may produce a more natural result than brightening the room and windows equally.
When Editing Is Not Enough
If important highlights were completely clipped during capture, the original detail may be unavailable. Bracketed exposures or a better-controlled reshoot may be needed.
2. Colors Look Wrong or Change Between Images
What Causes It?
Incorrect white balance, mixed lighting, inconsistent camera settings, and excessive saturation can all affect color.
A room lit by daylight and warm lamps may contain several color casts. Correcting the whole photograph with one adjustment may improve one area while making another worse.
How to Fix It
Use a reliable neutral reference where available. A gray card photographed under the same lighting can help establish a starting point.
Adjust temperature and tint, then inspect the subject rather than relying only on the background. Mixed-light scenes may need selective correction.
For product work, compare against an approved reference and avoid making colors more vivid merely to make the photograph stand out.
Work with a calibrated display where practical and embed the appropriate color profile in delivered files.
Example: If a cream handbag becomes bright white during editing, the result may look cleaner but no longer represent the product accurately.
Remember: Different screens and viewing conditions can still produce visible differences. Color management reduces inconsistency; it does not make every display identical.
3. Background Removal Leaves Rough Edges or Halos
What Causes It?
Automatic selections may struggle with hair, fur, lace, transparent materials, and reflective surfaces. Aggressive edge adjustments can remove fine details or leave traces of the original background.
A cutout that looks acceptable against white may reveal obvious defects against a darker color.
How to Fix It
Match the selection method to the subject.
- Use clipping paths for well-defined, solid edges.
- Use masking for soft, fine, or partially transparent boundaries.
- Combine methods when an object contains different edge types.
Inspect the result against contrasting backgrounds. Check for unwanted outlines, missing strands, jagged curves, and leftover background color.
Preserve realistic transparency. A glass object should not be treated like an opaque cardboard box.
Example: A furniture image may need a precise path around the wooden frame and a softer mask around textured upholstery.
4. Portrait Retouching Removes Natural Skin Texture
What Causes It?
Heavy smoothing can remove pores, flatten facial contours, and make the face look disconnected from the neck or hands.
Brightening the eyes and teeth too much can create a similarly artificial effect.
How to Fix It
Separate temporary distractions from natural identifying features.
Remove a temporary blemish where appropriate, but agree with the client before changing permanent marks, facial structure, or body shape.
Use localized corrections for uneven tone instead of applying strong blur across the face. Preserve texture and the natural transitions between light and shadow.
Review the result both close up and at normal viewing size.
Example: A professional headshot may benefit from reducing a distracting blemish and balancing skin tone while retaining expression lines and natural texture.
The person should still look like themselves.
5. Sharpening Makes the Image Harsh Instead of Clear
What Causes It?
Sharpening increases edge contrast. Applied too strongly, it can exaggerate noise and produce bright or dark outlines.
It cannot reliably restore information lost to severe missed focus or motion blur.
How to Fix It
Assess focus before attempting extensive correction.
Apply sharpening selectively where possible. Hair, fabric, and product details may need different treatment from smooth backgrounds or skin.
Evaluate noise reduction carefully: removing too much noise can also remove useful texture.
After resizing, apply output sharpening appropriate to the final image and inspect the exported file.
Example: Sharpening a noisy wall as strongly as the main subject may make the entire photograph look gritty.
Do not assume that a stronger setting means a better result.
6. Property Photos Have Leaning Walls or Stretched Rooms
What Causes It?
Tilting the camera can cause vertical lines to converge. Wide-angle capture and aggressive perspective corrections can also stretch objects near the edges.
These distortions may make a room feel unnatural even when its exposure is balanced.
How to Fix It
Correct relevant lens distortion and evaluate vertical alignment.
Use perspective adjustments carefully, watching furniture, doors, and objects near the frame edges. Allow space for the crop that correction may require.
Preserve realistic proportions. Avoid stretching the room to make it appear larger.
Example: Straightening a door frame is useful; making a nearby chair unnaturally wide introduces a new problem.
During capture, keeping the camera level can reduce the amount of correction needed later.
7. Shadows and Reflections Look Artificial
What Causes It?
A product placed on a new background may appear to float if its contact shadow is missing.
An added shadow can also look wrong if its direction, softness, or density conflicts with the lighting on the product.
How to Fix It
Study the existing light before creating or modifying shadows.
Pay particular attention to where the object touches the surface. The contact area often needs a different treatment from the softer shadow farther away.
Use reflections only when they suit the intended surface and scene.
Example: A soft, believable shadow beneath a shoe may communicate its shape more effectively than a large dark shadow extending in an unrelated direction.
Check whether the effect grounds the object naturally or draws unnecessary attention to itself.
8. Individual Images Look Good, but the Collection Feels Inconsistent
What Causes It?
Different photographers, lighting conditions, presets, or editing decisions can create variations across a catalog or gallery.
The problem becomes obvious when images sit beside each other: products vary in size, backgrounds shift in tone, and skin colors change between adjacent portraits.
How to Fix It
Create a visual reference before editing the full collection.
Define the crop, subject scale, background treatment, color approach, and retouching limits.
Group photographs by similar lighting conditions. Use batch adjustments as a starting point, then review individual exceptions.
Finally, inspect the collection in a grid or contact sheet.
Example: Two product photographs may both be well edited, yet look inconsistent if one item fills most of the frame and the other appears much smaller.
Consistency involves composition as well as color.
9. Photos Look Fine in the Editor but Poor After Uploading
What Causes It?
Export dimensions, compression, color profiles, and destination processing can change how an image appears.
A photograph may be uploaded at too small a size and then enlarged. Repeated compression can damage fine details. A crop designed for one placement may not suit another.
How to Fix It
Prepare exports for their destination.
Specify pixel dimensions, aspect ratio, file format, and the required color profile. For ordinary web photographs, sRGB is a common starting point; print delivery should follow the printer’s specifications.
Balance file size with visible quality. Examine compressed versions rather than assuming the smallest file is acceptable.
Review the published image on the actual page or layout.
Useful distinction: Changing a file’s PPI setting alone does not add detail. Pixel dimensions determine how much image information is available for screen display.
Which Editing Tasks Matter Most for Your Business?
E-Commerce Brands
Prioritize accurate product color, clean edges, consistent scale, readable details, and appropriate backgrounds.
Editing should make the item easier to evaluate without changing what the customer will receive.
Portrait and Wedding Photographers
Focus on natural skin tones, consistent gallery treatment, controlled distractions, and preservation of identity.
Agree on the level of retouching before processing a full assignment.
Real Estate Teams
Prioritize balanced lighting, believable color, straight verticals, and accurate representation of the space.
Keep material property features visible. Clearly distinguish virtual staging or significant alterations from photographs of the existing condition.
Advertising and Creative Agencies
Focus on matching the approved concept, preparing clean composites, and delivering usable versions for each placement.
For composites, check lighting direction, perspective, scale, and edge quality across every element.
Families and Photo Archives
Restoration can address scratches, fading, stains, and some forms of physical damage.
Keep an untouched scan. Where details are missing, reconstruction involves interpretation; invented detail should not be presented as a verified record of the original scene.
A Practical Editing Order That Reduces Rework
There is no single sequence for every photograph, but the following order is a useful starting point:
- Inspect the source: Check focus, exposure, resolution, and whether the image can meet the brief.
- Preserve the original: Work non-destructively or retain a separate untouched file.
- Correct the foundations: Address relevant lens issues, perspective, white balance, and overall exposure.
- Refine local areas: Balance the subject and background without flattening the lighting.
- Retouch selectively: Remove agreed distractions and refine edges while preserving important detail.
- Check consistency: Compare the image with approved references and related photographs.
- Prepare the output: Resize, apply suitable output sharpening, and export.
- Review the delivered file: Check the actual export, not only the editing document.
This sequence helps prevent detailed retouching from being disrupted by major corrections made too late.
Your Final Photo Quality Checklist
Before publishing or delivering images, check the following:
- Is the main subject immediately clear?
- Are exposure and contrast balanced without losing important detail?
- Do colors match the intended reference?
- Are fine edges clean against the final background?
- Does skin, fabric, wood, or metal retain believable texture?
- Are shadows and reflections consistent with the lighting?
- Are proportions and perspective natural?
- Do related images look consistent as a group?
- Are dimensions, formats, and filenames correct?
- Does the exported image look good at its intended display size?
A short, repeatable review often catches problems that additional editing would not solve.
When Should You Use Professional Photo Editing Services?
Specialist support is worth considering when an assignment requires difficult masking, detailed retouching, complex exposure blending, restoration, or consistent treatment across a large collection.
It can also help when your team repeatedly spends time correcting the same issues.
Before outsourcing, prepare a clear brief. Include original files, approved references, required changes, prohibited changes, delivery specifications, and deadlines.
Approve a representative sample before scaling up. Choose examples that include the difficult parts of the project—not only the simplest images.
Assess the result for accuracy, consistency, and usability rather than judging it solely by how dramatic the transformation looks.
Frequently Asked Questions
What is the difference between photo editing and photo retouching?
Photo editing is a broad term covering adjustments such as exposure, color, cropping, and resizing. Retouching usually involves more targeted changes, such as removing dust, refining skin, or correcting specific distractions.
Can editing fix every bad photograph?
No. Severe blur, missing detail, very low resolution, and heavily clipped exposure can limit the result. A reshoot may be more accurate and efficient than extensive reconstruction.
Should every photo receive the same preset?
A preset can provide a starting style, but different lighting and exposure conditions often need individual adjustments. Applying identical settings does not guarantee consistent-looking results.
Is a white background suitable for every image?
No. The appropriate background depends on the image’s purpose and destination. Product listing images, lifestyle photographs, portraits, and campaign visuals can have different requirements.
How much retouching is too much?
Retouching becomes excessive when it removes useful detail, changes important characteristics without approval, or makes the subject look unnatural for the intended use.
Get Editing Support That Matches Your Images
Recognizing the problem is the first step toward a better photograph. The next is choosing the right correction and applying it consistently.
Photo Editing Services Company offers services including clipping paths, image masking, product retouching, portrait and wedding retouching, real estate photo editing, restoration, virtual staging, and panorama stitching.
Whether you need clean product edges, more natural portraits, balanced property images, or help preparing a large collection, start with a clear brief and representative samples.
Explore Photo Editing Services Company to discuss your images, review the available services, and request a quote for your project.
